I promised myself that I wouldn't buy new fabrics this year, other than what I needed to complete existing projects... and technically the fabric for this quilt doesn't count, because I didn't buy it. I was visiting my friend M, and she happened to mention that she had bags of fabric scraps that she was getting rid of... who can say no to someone else's scraps?
It was like Christmas, going through her bag of scraps. Silly, I know. I get so excited when I get to admire bits of fabric: even small pieces of pretty prints or batiks can make my heart go pitter-patter. I was quite excited when I saw that she had cast off a bunch of coordinating strips and squares in cheerful, colourful baby prints. Adding in some fabrics from my own scrap bag, I was able to eek out a baby quilt, in a modern scrappy log-cabin based pattern. My son Connor is holding it up for me to photograph.
It's smallish, so it needs a border -- I hope to find something suitable in the next week or two. Then M agreed to machine quilt it, and we will donate it to the Relief Sale & Quilt Auction for next year.
I know, I cheated: this really qualifies as a new project, and I'm not supposed to start anything new. But it didn't take very long, and it was fun to make... so shh! Let's just pretend we didn't notice me making this quilt.
22 March 2013
31 January 2013
Quilting Day out at the farm
My friend Renske invited Margaret and I to come out to her farm to sew for a day. She had been given a stash of novelty prints, and had the idea of hosting a small quilting bee, to make I-Spy quilts for charity.
If you don't know what an I-Spy quilt is, quite simply it's a quilt made with many different squares of fabric depicting animals, toys, foods, vehicles, etc., which can be used to play "I-Spy" with a young child. You can say "I spy something orange!" or "I spy a fish!" and the child has to find the fabric containing the goldfish, for example. They are fun and cheerful quilts to make.
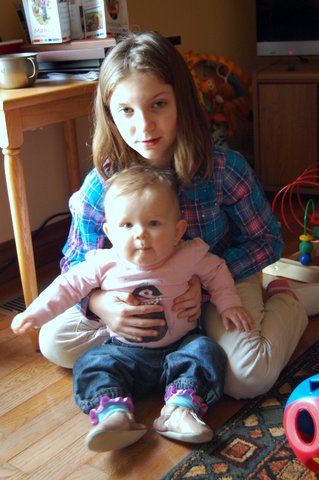
Margaret, as you can see by her big smile, was quite happy to miss a day of school to go quilting. She did pretty well for her age, getting three rows pieced and sewn together over the course of the day.
She might have done more, but she was distracted by Renske's cute grandchildren -- baby Evelyn (Margaret is cuddling her in this picture) and baby Jonas. Being the youngest in our family, Margaret hasn't had much opportunity to play with babies, and she was quite enthralled with Evelyn in particular, who was old enough to interact with her.
For me, Renske had set up an interesting quilt. She had all the novelty square cut already, and laid out on a design board. I was to cut long vertical sashing strips, then working in columns, sew the squares of each column down the length of the first strip, about an eighth of an inch apart. For the next column, sew each square on the opposite side of the strip, lining up each square with the one already sewn. Then sewing a second sashing strip to the opposite side of the second column of squares, then attach the next column of squares to the opposite side of the second sashing strip.
Maybe that sounds confusing. I was certainly confused when Renske first tried to explain it to me. So I just plunged in and started sewing, trusting it would all make sense as I worked -- and it did. Here I am holding up my work for the day: all vertical sashing strips sewed to all the blocks.
I took the quilt home at the end of the day to work on the next step -- separating the rows by cutting the vertical strips between the squares. I will then offset the alternate rows, and attach them with horizontal sashing strips.
The last photo shows all the quilts that came out of that sewing day -- me with my quilt at left, then Renske's daughter Jeanette, Margaret with her partially pieced top, and Renske's daughter-in-law, Emily.
It was a lot of fun! But next time I will have to remember to get up and stretch more often -- my shoulders were pretty tired afterward from so many hours at my machine!
If you don't know what an I-Spy quilt is, quite simply it's a quilt made with many different squares of fabric depicting animals, toys, foods, vehicles, etc., which can be used to play "I-Spy" with a young child. You can say "I spy something orange!" or "I spy a fish!" and the child has to find the fabric containing the goldfish, for example. They are fun and cheerful quilts to make.
Margaret, as you can see by her big smile, was quite happy to miss a day of school to go quilting. She did pretty well for her age, getting three rows pieced and sewn together over the course of the day.
She might have done more, but she was distracted by Renske's cute grandchildren -- baby Evelyn (Margaret is cuddling her in this picture) and baby Jonas. Being the youngest in our family, Margaret hasn't had much opportunity to play with babies, and she was quite enthralled with Evelyn in particular, who was old enough to interact with her.
For me, Renske had set up an interesting quilt. She had all the novelty square cut already, and laid out on a design board. I was to cut long vertical sashing strips, then working in columns, sew the squares of each column down the length of the first strip, about an eighth of an inch apart. For the next column, sew each square on the opposite side of the strip, lining up each square with the one already sewn. Then sewing a second sashing strip to the opposite side of the second column of squares, then attach the next column of squares to the opposite side of the second sashing strip.
I took the quilt home at the end of the day to work on the next step -- separating the rows by cutting the vertical strips between the squares. I will then offset the alternate rows, and attach them with horizontal sashing strips.
The last photo shows all the quilts that came out of that sewing day -- me with my quilt at left, then Renske's daughter Jeanette, Margaret with her partially pieced top, and Renske's daughter-in-law, Emily.
It was a lot of fun! But next time I will have to remember to get up and stretch more often -- my shoulders were pretty tired afterward from so many hours at my machine!
28 December 2012
Noflike Krystdagen!
I enjoy every card and letter I receive during the holidays, but it's extra special to receive such a personal token of friendship. And this year, I decided it was about time that I made one to give to her in return!
Renske was born in Friesland, and she has had a lifelong love of Frisian horses. I chose to make her a card that depicted a Frisian horse, its mane and tail represented by black beads, with some green and red beads added in for a Christmassy touch.The body of the card is Pellon, which is stiff and fusible on both sides. I fused the light coloured fabric to one side, then cut out the horse shape and zig-zagged it on to the centre of the field. My nine-year-old daughter has a vast collection of beads, and I borrowed a few to create the mane and tail. (The red and green beads don't show up as well in the photo as they do in real life!) Then I fused on the backing fabric, covering all the stitches. I created a contrasting edge by zig-zagging around the whole card with black thread. Really, it was a pretty simple project: handsewing the beads was the most time consuming part of it all.
Then I decided to Google the Frisian words for 'Merry Christmas', and thanks to a translation site, I found the phrase: "Noflike Krystdagen en in protte Lok en Seine yn it Nije Jier." I understood it to mean, "Merry Christmas, and good luck and health for the New Year." I wrote it on the back of the card and added my name, hoping that it was right, or close enough that she would understand the sentiment.
Although it's theoretically possible to send a quilted postcard through the mail by simply putting a stamp on the back, I was afraid of the beads getting stuck in a letter-sorting machine, so I wrapped the card in tissue paper and put it in an envelope before mailing it.
Today, Renske emailed to say that she'd received it, and was delighted to have gotten Christmas wishes in her native tongue. It was very fulfilling to send her a personal card! I loved the warm and fuzzy feeling I got as I read her 'thank you' message -- I will definitely be making more homemade cards in the future!
Subscribe to:
Posts (Atom)