10 November 2013

Autumn Retreat

I know -- I haven't blogged for a long time! With our house under renovation, I've had my sewing stuff packed up for weeks and weeks, trying to protect my fabrics from drywall dust!

But, finally, the time came to escape from real life and attend a quilting retreat! I just love getting away with the ladies to sew and quilt and eat for a few days.  It's such a great way to recharge! And sometimes I get more sewing done in those few days than I do the whole rest of the year -- well, there's no kids to interrupt, to laundry to do, etc. It's just sewing -- or knitting -- as much as we like, mixed with a little swimming or hot tub time (the B&B we stay at has a small indoor pool), and going to bed when we're tired.

This time, I was lucky enough to get a private room: it wasn't fancy or big, but it was quiet and included a small electric fireplace! This is what I got to enjoy in the evening while I sat in bed reading. Nice!

Although we always go in the off-season, there are still great views of the lake to enjoy; if it's not too windy, we might walk on the beach. Here's a picture of the sun setting over the lake -- a view we could easily enjoy from the dining room at dinner.

And yes, I did actually get some sewing done! It was a bit of a panic the night before we left -- I couldn't figure out which boxes I'd stashed fabrics and notions and tools in! I was beginning to worry that I wouldn't find enough pieces of anything to create a project to work on! But at last I dug out the orange and turquoise batiks I'd bought with which to make a summery drunkard's path quilt. I even found the templates! Here are a few of my blocks, made on the first evening. I was able to make most of the blocks during the retreat, although I was careful not to push myself too hard: I'm in physiotherapy for my rotator cuff, and as soon as my shoulder started aching even a little, I immediately took a break.

Not only that -- I was introduced to a new hobby this weekend! My friend Wendy mentioned that she was going to take a break from quilting to go geocaching. As she described it, I became very intrigued. I liked the idea of following a compass to some coordinates, and then trying to locate the hidden "treasure", even if it was just a log book to sign and date. I asked whether I could go with her -- and half an hour later, we were tramping through the nearby trails. Here I am, finding our second cache that day. We found 10 caches altogether, and stopped for lunch along the way. A really fun change of pace for a quilting weekend!


05 August 2013

Mouse's I-Spy Quilt

Back in January, the Mouse and I pieced some I-Spy quilts for charity, at my friend Renske's farm. Here we are, the four charity quilters, posing with what we were able to complete that first day.

Mouse brought hers home and finished piecing the rows to make a crib-sized quilt, and I added the green border for her. It was then handquilted by an acquaintance of Renske's and donated to a charity Quilt Auction this spring.

A couple of weeks before the Auction, Mouse's quilt was on display, along with others destined for the same auction,  at a local museum. Here she is pictured standing in front of it.

It was auctioned for $350, and the full amount will go to charitable relief efforts! Yay Mouse! Way to go! What a great accomplishment for such a young lady. I'm very proud of her!

02 August 2013

Update on cottage quilt

I said I would post a better picture of my Thousand Pyramids quilt, made for our bed at the cottage, so here it is!

I'm still happy with the scrappy look, and I used a number of fabrics with a cottagey theme, like cabins, bears and wood grain, etc. I let Barry pick the backing fabric, and he chose a gold flannel, so it's nice and snuggly.

With this quilt, I've finally fulfilled my goal to "Sleep under a quilt I've made myself", since my other finished pieces were twin-size or smaller.

I liked the triangle pattern, and would like to make another some time. I saw a great quilt in a quilt store, where the upright triangles were all a dark brown batik and all the down-pointing triangles were bright batiks. It looked like a wonderful jewel box of colour! I've also seen a pyramid quilt done in blue and white only, which was quite striking. So much inspiration, so little time...!!!


30 July 2013

Yoga bag

For some time, my yoga-loving husband Barry had been hinting that I should make him a bag for his yoga mat. Inspired by some pins I saw on Pinterest, I decided to make him a fun but masculine bag, using a pant leg from a pair of old jeans.

At first, I was going to use blue denim, and then find a nice fabric to use as a contrast cuff and strap. But after going through my stash and finding a couple of lovely black and gold koi print fat quarters, I opted to switch to a retired pair of black denim jeans.

I sliced off one leg from the jeans, cut it open along the inseam, then squared it up as best as I could (even "straight leg" pant legs are much more tapered than you might think!) The main thing was to keep enough fabric to easily fit around a rolled up yoga mat, including plenty of room for a seam.

I cut a circle out of the koi fabric and used it to decorate the bag; I then stitched the tube closed again, securing the two ends of the shoulder strap (also made from koi fabric) in the seam.
To finish the closed end of the bag, I cut a circle of black denim of a slightly larger circumference than the end of the denim tube. I wanted to personalize the bag, but preserve that "yoga look", so I googled the Sanskrit word for "Bear", Barry's nickname. I printed out the Sanskrit lettering, used an exacto knife to slice out the letters to make a stencil, then marked the word out on the denim circle. Denim is pretty thick fabric, so my sewing machine worked slowly to trace the lines of the marking in a satin stitch, using gold thread. It was the hardest and slowest part of the hold project, to tell you the truth. And since I don't read Sanskrit, I have to trust that this word actually is "bear". 

I inverted the tube of the bag and meticulously pinned the end circle in place, then stitched around the circumference three times. At the open end of the bag, I made a cuff of koi fabric, stitched it in place, then top stitched.

What do you think? Does this bag scream, "I am a Yoga man"? Well, hubby is happy with it, so I guess that's all that counts!

26 June 2013

Quilts at Joseph Schneider Haus

The only thing almost as fun as quilting, is looking at other people's quilts. I can never resist a quilt show or display.

I'm partial to antique quilts, in particular, and enjoyed walking through Joseph Schneider Haus this spring during their quilt festival display. You get to see some lovely antique quilts on display in this period home.

I really liked this quilt, which reminds me of the swirly hard candies my Mom used to buy at Christmastime. Somebody did a lot of careful handpiecing to make this beauty! Very pretty and colourful. It makes me think of the lines, "The children were nestled, all snug in their beds/ While visions of sugarplums danced in their heads."

I also love antique log cabin quilts, with the traditional red square in the centre of the block, to represent a fire burning in the hearth in the heart of the cabin. So I couldn't resist snapping a shot of this lovely old log cabin quilt as well.

I'm not sure how I would do with the swirly piecing in the circle quilt, but a log cabin quilt could be a fun project. In this quilt, I like the really strong contrast of the bright red centre square and the muted "logs".

I could imagine making a similar log cabin with flannel fabrics -- really cozy and cuddly for a winter night, don't you think?

More inspiration for future projects!


29 April 2013

... and a quilt for my Mother-in-law!

First of all, I want to show you the completed quilt top I made for my father-in-law, with the borders added. When Barry and Connor held it up in front of the window, it had a great stained-glass effect! I think it turned out well -- FIL seemed happy with it -- and now it's just a matter of getting it quilted. I have to pick up some batting and backing this week, and the machine quilter has promised me that she can get it done in late May, so that's exciting.

Next, it was time to finish up the quilt I'd planned for my mother-in-law, who is also turning 70 this spring. I wanted to use pinks, purples and blues because I understand those to be her favourite colours, so I had my son Scotty come with me to the local quilt store to pick out some batiks. He knows that Grandma likes gardening, so he looked for batiks that had flowers in them, and we decided to go with curved piecing, to suggest a bed of pretty blooms. What do you think? Does it look like flowers popping out all over the place? Or maybe moons in the garden?? 

Because our house is currently under construction, I ended up doing a lot of sewing in the classroom of my local quilt shop. It was amazing how many people, upon seeing the blocks go up on the design wall, said to me, "Wow, you must really love your mother-in-law!"

This quilt is also due to be quilted in late May, and I'm glad both MIL and FIL will have their quilts before summer.

Deep breath, stretch... and on to the next project!


15 April 2013

A quilt for my father-in-law


Behold! Here is a quilter in her natural environment -- a quilt shop. See me, enraptured by the bolts and fat quarters, inspired by the shop samples, seduced by the promise of another exciting workshop!

To tell the truth, I'm actually on the job, gathering info for the store's quarterly newsletter. It's kind of fun to write it, because I get a sneak peek at all the latest products and upcoming classes. But I have promised myself, I am not buying more fabric, kits or patterns until I have finished up the many projects I have already half-completed, and/or used up my bulging stash.

So when I decided to make my father-in-law a quilt for his upcoming 70th birthday, I turned to my stash. There, I found a gorgeous jellyroll of autumn batiks, purchased quite some time ago simply because I loved the warm colours. Time to turn them into something charming and masculine.

I played around with ideas for a while, skimming the Internet for inspiration, and came across a photo of a pattern much like this, which was described as "keys". I think it looks like puzzle pieces. Another quilter at the retreat said the blocks look like capital F's. Whatever you want to call it, the blocks were easily constructed using jelly roll strips, although I had to add in other fabrics from my stash in order to make enough blocks. One jelly roll is not enough to make a quilt. You really need two, or preferably three jelly rolls. In which case, you might as well just buy yardage. But anyway.

I pieced the individual blocks (ie, each pair of interlocking pieces) at home, then brought the blocks to the retreat, where I laid them out on my friend's design wall, worked hard to "randomize" them, then sewed them together. I had to buy some fabric to add borders -- I didn't have enough of anything that went with the quilt -- so in the next few days, I need to finish the borders off... by the time this post is published, it should be his birthday and he should have opened it! I will try to remember to add a pic of the completed quilt top.

Unfortunately, after he receives it, I'll have to take it back for a while -- I couldn't get a date to have it machine quilted before the end of May. But I hope that in about a month and a half from now, he'll be napping happily under it!

And I can feel good that my long-hoarded autumn batik jellyroll has been put to a good use. One more thing that has graduated from stash limbo to the paradise of completion. One step closer to being able to buy new fabrics again!

07 April 2013

Sweet Retreat: Part III

 Here's another quilt that sat for ages in my cupboard -- the pattern is called "Grandpa's Best" (I think), and I made the centre part of it at a workshop that was supposed to teach speedy cutting and piecing. Unfortunately, it didn't teach speedy finishing, and it took me years to finally add the two borders to finish it off.

To be fair, for a long time I had the idea that I would do some sort of fancy applique on the gold border -- I was going to cut it quite a lot thicker, and maybe add vines, grapes, leaves, pears, etc. But finally I decided I just wanted it FINISHED, so I decided to attach the borders and get it quilted. Perhaps some nice quilting in the border will finish it off -- I'll see if the machine quilter has any ideas.

I've always thought this quilt would make a great Christmassy wall-hanging, so if I hurry up and get it quilted this summer, it can deck my halls come December!

Sweet Retreat: Part II

Here's another incomplete I was able to finish at the retreat: a nine-patch made from a Moda charm pack.

I totally understand why people buy charm packs -- or jelly rolls, or layer cakes: you get a handful of pretty, coordinating fabrics that are very visually appealing! The reality, however, is that once you get your precuts home, you realize how limited you are in what you can make with them. Unless you're happy churning out a table runner or wall hanging, a charm pack simply isn't enough fabric to be useful.

I managed to eek a quilt out of my single charm pack first by cutting each charm square in four, then mixing them with white and off-white prints to make nine-patches. But that still wasn't usefully quilt-sized. So I went back to the quilt store where I bought the charm pack to begin with, and they still had some of the fabrics that appeared in the charm pack on the bolt -- so I picked the blue fabric with large pink and yellow roses, because it contains all of the colours that appear in the other fabrics. I was going to attach the fabric directly as a wide border, but my fellow quilter Karen -- who is quite accomplished and artistic -- suggested that I frame the nine-patch centre with a thin green strip first. I did, and I think it does a nice job of setting the squares off.

Not sure yet what the destiny of this quilt is, but it looks to me like a quilt to snuggle with on the porch, on a cool summer evening.

Sweet Retreat: Part I

I know, I haven't posted in a while! We are currently living through a renovation, and the chaos has pushed off all but the most essential tasks. Which means that I barely spent any time sewing in late January and through February.
But happily, March brought me to my quilt guild's annual retreat, on the shores of Lake Huron. Luxurious days of sewing in my pajamas, stopping only to eat, sleep, or soak in the hot tub. Truly, it's the life!
Vowing that I would use the opportunity to catch up on my incomplete projects, I packed a suitcase full of UFO's. First on the list were a couple of I-Spy quilts, destined for charity. This first one was pieced by my daughter Margaret back in January, at my friend Renske's house. She did a pretty good job for a 9 year old; all it needed was a border, and so I added the wide band of green.
As an update, after I gave the completed top to Renske, she had it handquilted by another acquaintance of hers, and the quilt will be auction this May at the Mennonite Relief Sale & Quilt Auction in New Hamburg. I'm quite excited about this, and hope that Margaret will be proud of her accomplishment (at the moment, she's a bit shy, and only reluctantly agreed to have her name on the quilt label).
That same day at Renske's, I had partially pieced an I-Spy using a sneaky method Renske showed me. I had to finish the horizontal sashing, off-setting alternate rows of blocks, and then apply a border. I thought it turned out surprisingly well. I really like the staggered effect of the offset squares.
My completed top is going to Joseph Schneider Haus, a local museum, where it will be the back-up quilt for the annual Quilting Bee (i.e., if they finish the first top before the end of the designated Quilting Bee days, they will move on to quilting my quilt). I imagine my quilt going on to the Relief Sale in 2014, although it could also be donated to the local hospital (our guild supplies "Smile Quilts" for children in hospital with serious or chronic medical conditions).
It felt great to have uninterrupted time to get these quilts finished! And then, it was on to the next!


22 March 2013

Scrappy baby quilt

I promised myself that I wouldn't buy new fabrics this year, other than what I needed to complete existing projects... and technically the fabric for this quilt doesn't count, because I didn't buy it. I was visiting my friend M, and she happened to mention that she had bags of fabric scraps that she was getting rid of... who can say no to someone else's scraps?

It was like Christmas, going through her bag of scraps. Silly, I know. I get so excited when I get to admire bits of fabric: even small pieces of pretty prints or batiks can make my heart go pitter-patter. I was quite excited when I saw that she had cast off a bunch of coordinating strips and squares in cheerful, colourful baby prints. Adding in some fabrics from my own scrap bag, I was able to eek out a baby quilt, in a modern scrappy log-cabin based pattern. My son Connor is holding it up for me to photograph.

It's smallish, so it needs a border -- I hope to find something suitable in the next week or two. Then M agreed to machine quilt it, and we will donate it to the Relief Sale & Quilt Auction for next year.

I know, I cheated: this really qualifies as a new project, and I'm not supposed to start anything new. But it didn't take very long, and it was fun to make... so shh! Let's just pretend we didn't notice me making this quilt.

31 January 2013

Quilting Day out at the farm

My friend Renske invited Margaret and I to come out to her farm to sew for a day. She had been given a stash of novelty prints, and had the idea of hosting a small quilting bee, to make I-Spy quilts for charity.
If you don't know what an I-Spy quilt is, quite simply it's a quilt made with many different squares of fabric depicting animals, toys, foods, vehicles, etc., which can be used to play "I-Spy" with a young child. You can say "I spy something orange!" or "I spy a fish!" and the child has to find the fabric containing the goldfish, for example. They are fun and cheerful quilts to make.
Margaret, as you can see by her big smile, was quite happy to miss a day of school to go quilting. She did pretty well for her age, getting three rows pieced and sewn together over the course of the day.
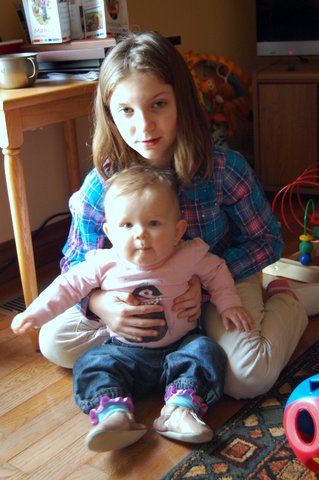
She might have done more, but she was distracted by Renske's cute grandchildren -- baby Evelyn (Margaret is cuddling her in this picture) and baby Jonas. Being the youngest in our family, Margaret hasn't had much opportunity to play with babies, and she was quite enthralled with Evelyn in particular, who was old enough to interact with her.
For me, Renske had set up an interesting quilt. She had all the novelty square cut already, and laid out on a design board. I was to cut long vertical sashing strips, then working in columns, sew the squares of each column down the length of the first strip, about an eighth of an inch apart. For the next column, sew each square on the opposite side of the strip, lining up each square with the one already sewn. Then sewing a second sashing strip to the opposite side of the second column of squares, then attach the next column of squares to the opposite side of the second sashing strip.
Maybe that sounds confusing. I was certainly confused when Renske first tried to explain it to me. So I just plunged in and started sewing, trusting it would all make sense as I worked -- and it did. Here I am holding up my work for the day: all vertical sashing strips sewed to all the blocks.
I took the quilt home at the end of the day to work on the next step -- separating the rows by cutting the vertical strips between the squares. I will then offset the alternate rows, and attach them with horizontal sashing strips.
 The last photo shows all the quilts that came out of that sewing day -- me with my quilt at left, then Renske's daughter Jeanette, Margaret with her partially pieced top, and Renske's daughter-in-law, Emily.
It was a lot of fun! But next time I will have to remember to get up and stretch more often -- my shoulders were pretty tired afterward from so many hours at my machine!

28 December 2012

Noflike Krystdagen!

Over the years, I have received several beautiful handmade Christmas cards from my good friend Renske. They usually take the form of a quilted postcard, and each one is so unique and lovely that I've kept them all, displaying them every year at Christmastime as part of our holiday decorations.

I enjoy every card and letter I receive during the holidays, but it's extra special to receive such a personal token of friendship. And this year, I decided it was about time that I made one to give to her in return!

Renske was born in Friesland, and she has had a lifelong love of Frisian horses. I chose to make her a card that depicted a Frisian horse, its mane and tail represented by black beads, with some green and red beads added in for a Christmassy touch.

The body of the card is Pellon, which is stiff and fusible on both sides. I fused the light coloured fabric to one side, then cut out the horse shape and zig-zagged it on to the centre of the field. My nine-year-old daughter has a vast collection of beads, and I borrowed a few to create the mane and tail. (The red and green beads don't show up as well in the photo as they do in real life!) Then I fused on the backing fabric, covering all the stitches. I created a contrasting edge by zig-zagging around the whole card with black thread. Really, it was a pretty simple project: handsewing the beads was the most time consuming part of it all.

Then I decided to Google the Frisian words for 'Merry Christmas', and thanks to a translation site, I found the phrase: "Noflike Krystdagen en in protte Lok en Seine yn it Nije Jier." I understood it to mean, "Merry Christmas, and good luck and health for the New Year." I wrote it on the back of the card and added my name, hoping that it was right, or close enough that she would understand the sentiment.

Although it's theoretically possible to send a quilted postcard through the mail by simply putting a stamp on the back, I was afraid of the beads getting stuck in a letter-sorting machine, so I wrapped the card in tissue paper and put it in an envelope before mailing it.

Today, Renske emailed to say that she'd received it, and was delighted to have gotten Christmas wishes in her native tongue. It was very fulfilling to send her a personal card! I loved the warm and fuzzy feeling I got as I read her 'thank you' message -- I will definitely be making more homemade cards in the future!


12 December 2012

Wrath of the Creeper

I don't even want to tell you the story of this quilt: it's so convoluted. And such a terrible comment on my self-discipline up until the present moment (I've recently discovered that self-discipline is simply a matter of setting a time to do something, then doing it. Works amazingly well.).

The fact is, I bought this fabric to make a quilt for my oldest son when he was about 5. This year he turned 16. Yeah. Pathetic, I know. It was just about my first quilt, and although my cuts were pretty accurate, my early blocks were sewn with inexact seam allowances, and sometimes I pressed the seams open instead of to the side. And my blocks were joined a bit haphazardly, too. I had no concept of following a pressing direction for blocks and rows, so the seams went all over the place at the back. But over the years, as my quilting knowledge improved, so did my technique. I also changed machines twice, and used a total of four different presser feet as I sewed.

Consequently, as I happily sewed on my last row and pronounced the quilt finish for the first time (a couple years ago), I little suspected that I would later measure it to discover that the quilt was several inches narrower at the top than at the bottom. Grrr.

In frustration, I hid the completed quilt top in my sewing cupboard. I was unhappy with it, but wasn't sure what to do to fix its problems. In the end, I plucked up the courage to start picking it apart... I had the idea that I would resew the squares together in 6x6 blocks (about 24" across), and the use a quilt-as-you-go method to join the sections.

In the meantime, with Connor growing older, I began itching to make him a video game-related quilt -- something that reflected his current interests. Then I saw this picture on his computer screen one day:

Hmm. The monster whose face is depicted above is called a "creeper" and it appears in the game Minecraft. You can see how easily he would translate into quilt squares. And since I already had numerous squares in shades of green (okay, and blue and orange and purple), I could easily imagine myself adding in some black squares to make creeper faces, and voila! The quilt was reinvented as a teenage boy's video game quilt. The photo below shows the completed quilt top on my queen-size bed.

It has since gone off to be machine quilted -- I let Connor pick the backing, thread and quilting pattern, and he has chosen to call the quilt "Wrath of the Creeper". He is eager to get it back and put it on his bed. I am happy to finally have this project off my sewing table!


27 November 2012

Monstrous patch

I saw something like this on Pinterest, and couldn't resist trying the idea on a pair of Barry's jeans that needed mending. I zig-zagged around the hole, but fused the eyes and teeth using Steam-A-Seam, so I hope they hold up! I would have sewn them all, but I quickly discovered how awkward it is to feed a pant leg onto my machine, let alone trying to do any stitching once it's there!

I guess I could have taken the leg seam out, fixed the hole, and sewn the leg back up again, but that was way more work than I wanted to go to for a pair of pants he wears in the garage. If I were going to do any special embellishment on a pair of good jeans, I would definitely take out the leg seam first.

So fun! I hope I wear out a knee on my own jeans soon!

25 November 2012

A quilted wedding gift

A friend of mine in England recently got married. I couldn't make it to her wedding, but I wanted to give her a personal gift, so I decided to make her a quilt.

I saw the pattern and suggested fabrics for this quilt in my local quilt store, and the moment I clapped eyes on it, I knew it was the quilt I wanted to make for her. Pretty, but not too feminine, highlighted with some of the lovely greens and teals I've seen her pin on her Pinterest board.

As it turns out, the quilt quite coincidentally is a perfect match for her livingroom -- the picture shows the quilt on her couch! It was machine quilted by Brenda Wiles of Creative Sisters Quilt Studio, and when I mentioned it was a wedding gift, Brenda suggested quilting a floating hearts pattern into it, which looks fantastic.

I'm really happy with how it turned out, and it was enthusiastically received by my friend. I have to tell you, though, it's hugely expensive to mail a quilt overseas! So I don't think I'll be shipping quilts around the world on a regular basis. Still, I like knowing that I was able to give her something personal that I made myself. I hope she and her hubby will be happily snuggling under it for a long time!

03 September 2012

It's finally hanging!

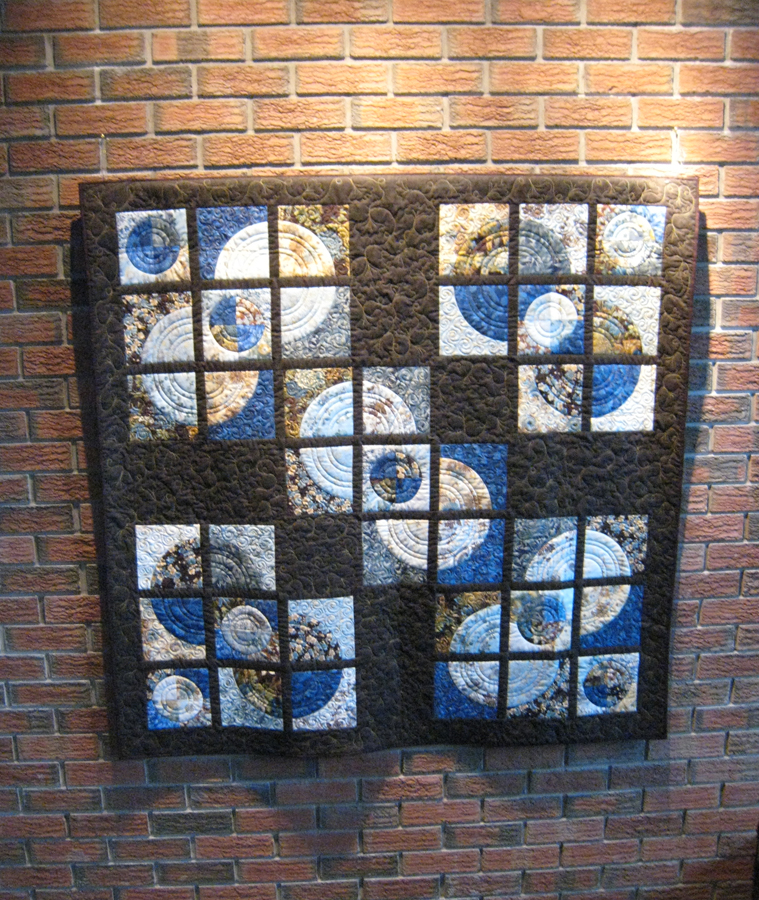
My husband kindly hung my Moon in the Window quilt on the brick wall beside our staircase.
The bottom isn't hanging quite straight -- I might add some weights or a second pocket and rod along the bottom edge... Still thinking about that.

But I'm happy with how the moons turned out, and the quilting by Linda Weinstein of Creative Sisters is fabulous! I will have to take some close up shots!

12 July 2012

1000 Pyramids in action

Here's a slice of life -- my Thousand Pyramids quilt on our bed at the cottage... being napped on by both the cat and the dog.

The quilt has a scrappy selection of fabrics for the pyramids, and a golden brown flannel on the back. I'll have to take a picture of the whole thing, once the pets have finished with their beauty sleep!

27 June 2012

Quilted Postcards

Margaret and I decided to attend a class on making quilted postcards. Basically, you fuse fabric of your choice onto one side of a rectangle of Peltex, quilt as desired, then fuse a piece of plain muslin to the other side of the rectangle. Surge around the edges, and you have a postcard!

 Here is one of the postcards I made -- I used a fabric marker to write a Thank You message on one side, and on the other, I wrote a message to Margaret's teacher at the end of the school year.

You might notice that there's not much quilting happening on this card. That's because, part way into the class, my sewing machine broke! Most frustratingly, the bobbin casing came out of alignment, and I couldn't sew. I'd had it serviced just before the class, and the repair person hadn't reassembled it properly! I had to make do for the rest of the class, cutting and fusing, but not quilting or sewing.

Here's another postcard I made that day -- I actually got some stitching in on this one before my machine went kaput.

Making postcards was a lot of fun, and Margaret really enjoyed the class. The postcards were a good, small project, easy to do for a sewer with not very much experience.

Now, if I'm organized, I will keep the momentum going, and use the rest of my peltex to create some fabric Christmas cards this year! I have a friend who has given me a fabric card every year for the last several years. They are a delight to get, and I keep them and use them in subsequent years as part of my holiday decorating!

21 June 2012

Grandpa's Best

Here's another quilt in line to be finished: the pattern is called "Grandpa's Best" and I made it at a class at Creative Sisters Quilt Studio. The blocks are completed and pieced together -- all I need to do is add borders and get it quilted! The colours would be nice for Christmas... can I be that organized?